

Vehicle
2012 Sport S Unlimited
Tools & Supplies
1/2" drive breaker bar
3/8” or 1/2" drive ratchet
3/8” or 1/2" drive extensions
10mm, 13mm, 16mm, and 5/16” sockets
10mm combination wrench
Diagonal pliers
Torque wrench
Mopar Engine Block Heater, Part Number 4609325AB
Mopar Heater Power Cord, Part Number 68142875AA
M6x1.0x25mm bolt
M6 flat washer
Notes
A. The block heater is a dry type and sets in a pocket or well on the driver’s side of the block behind the AC compressor.
B. The power cord is similar to a standard UL listed AC voltage cord with one end designed to plug into the heater and the other end featuring a male plug.
C. Optional: I placed 3/8” plastic loom over the power cord to provide more protection.
Steps
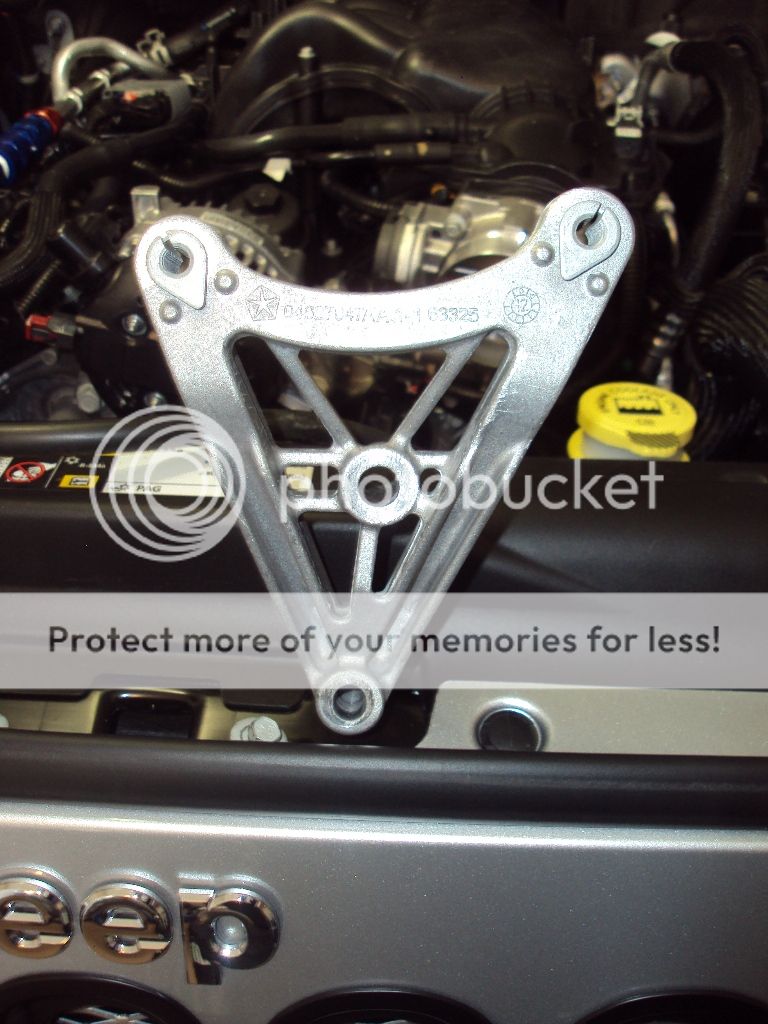
1) Remove the air intake hose from the air cleaner and throttle body. Remove the two bolts that fasten it to the top of the radiator and loosen the clamp on each end. Make sure to unplug the inlet air temperature sensor harness.
http://i420.photobucket.com/albums/pp282/ssgjurista/DSC01168.jpg
![Image]()
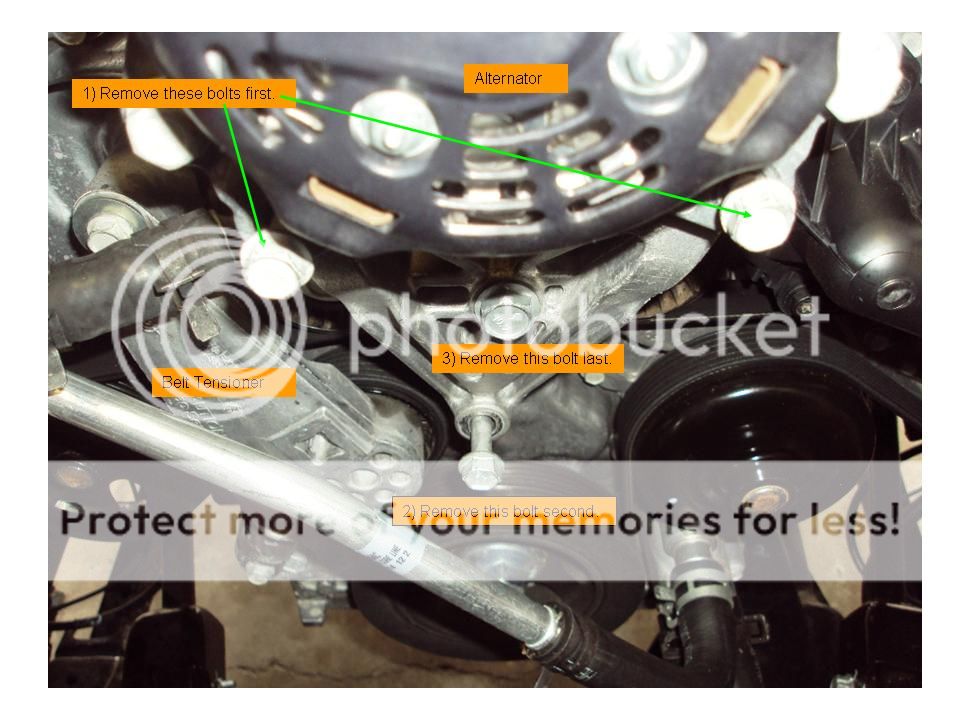
2) Remove the four bolts from the alternator support bracket and remove the bracket. Once the bracket is out of the way, you will be able to see the serpentine belt and idler pulleys.
NOTE: The alternator is still mounted and will not fall.
http://i420.photobucket.com/albums/pp282/ssgjurista/5Nov2012009.jpg
![Image]()
http://i420.photobucket.com/albums/pp282/ssgjurista/DSC01170.jpg
![Image]()
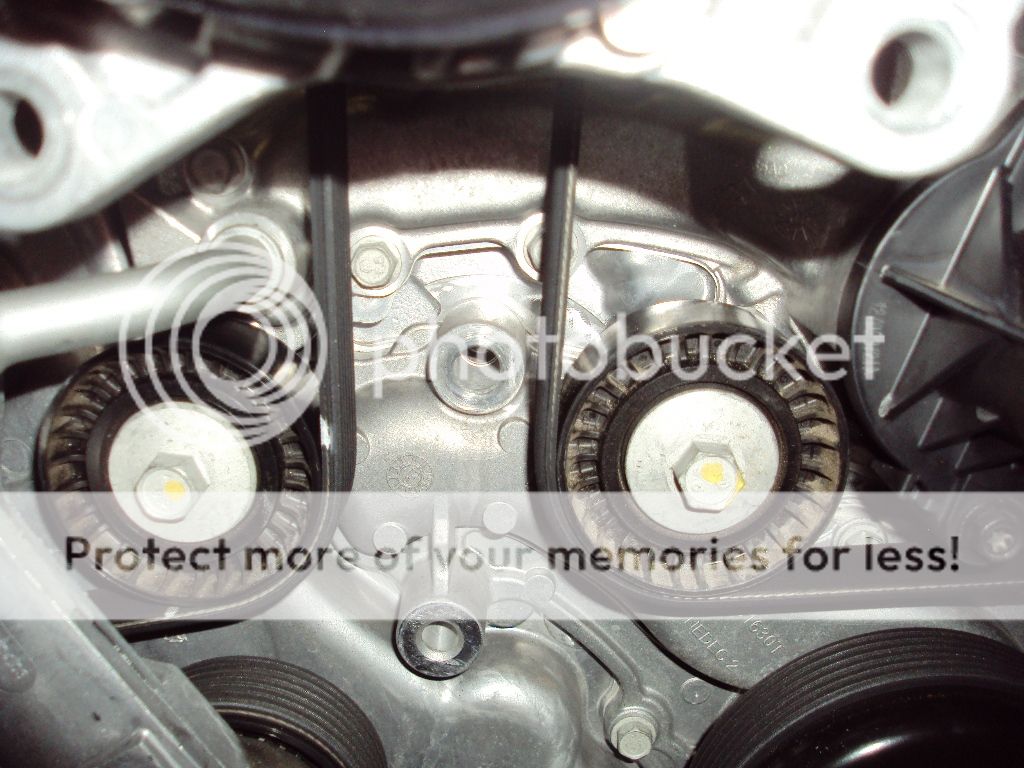
3. Insert a ½” drive breaker bar in the square hole on the belt tensioner and push/pull the tensioner clockwise or down. While holding the breaker bar with one hand, remove the serpentine belt from the idler pulleys and alternator pulley. Then slowly release the belt tensioner. Then remove the belt from the AC compressor pulley.
NOTE: It may be helpful to draw a quick sketch of the belt routing to aid in re-installing the belt.
http://i420.photobucket.com/albums/pp282/ssgjurista/5Nov2012010.jpg
![Image]()
http://i420.photobucket.com/albums/pp282/ssgjurista/5Nov2012012.jpg
![Image]()
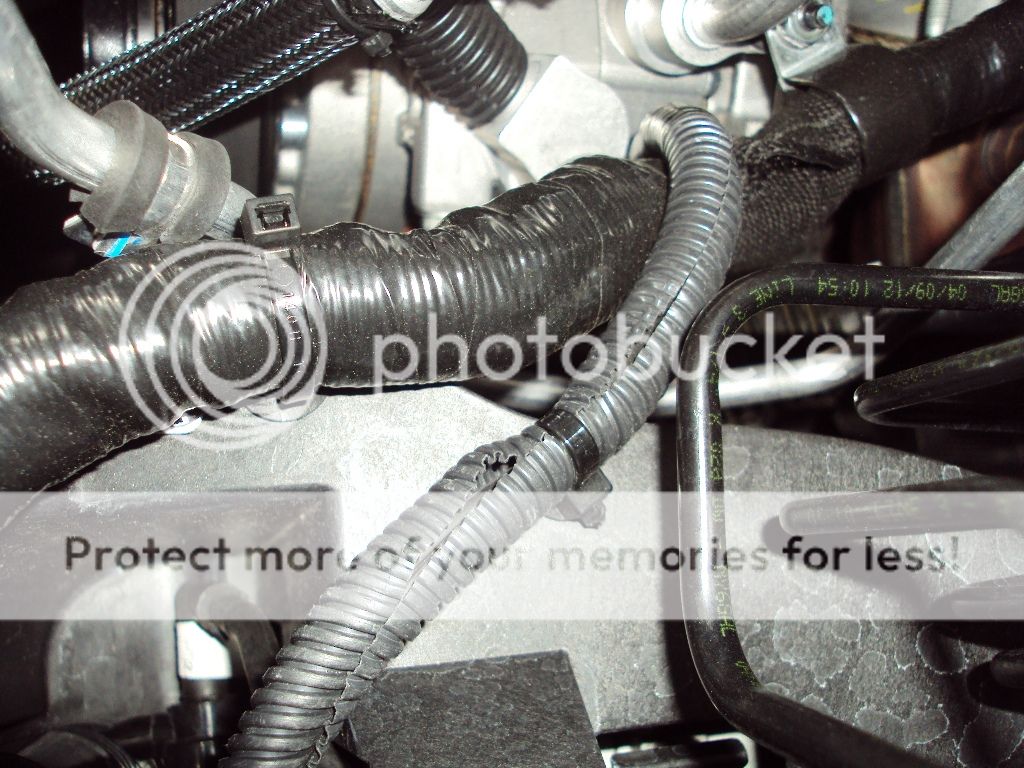
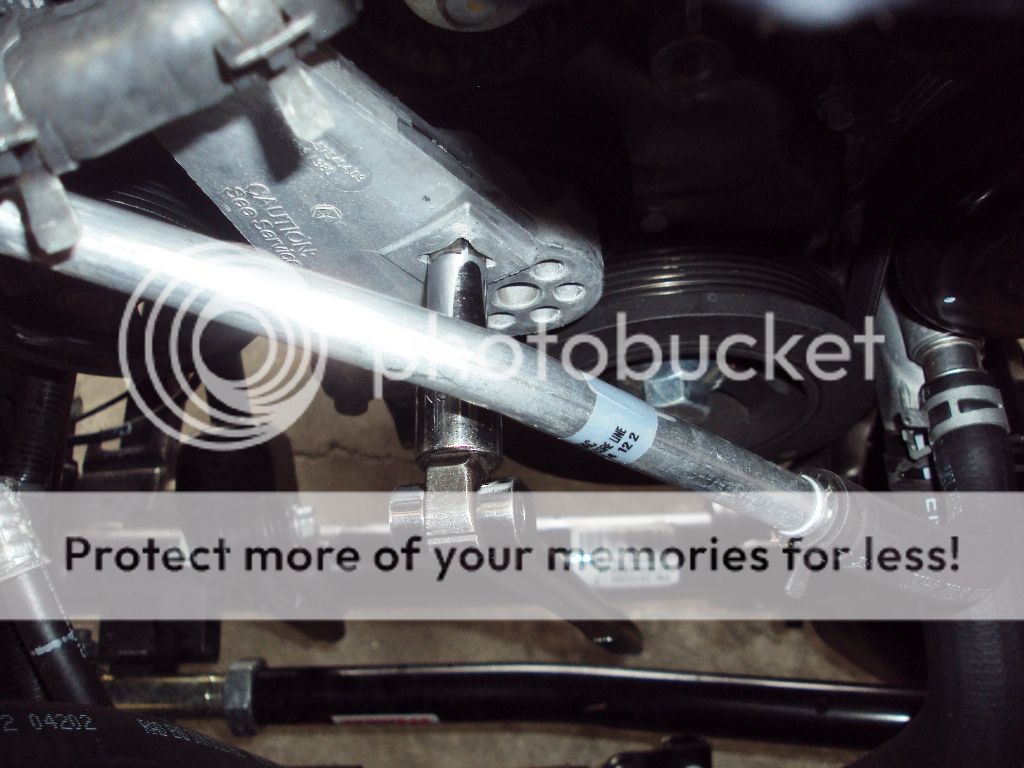
4. Remove the bolt from the upper end of the intermediate steering shaft where it attaches to the stub shaft on the firewall. Pull the shaft toward the front of the Jeep; it will compress. Then carefully lay the shaft down. This will allow easier access to the upper compressor bolts.
http://i420.photobucket.com/albums/pp282/ssgjurista/DSC01171.jpg
![Image]()
5. From underneath the Jeep, loosen and remove the two lower compressor bolts.
6. Carefully remove the engine/ECM harness from the studs on the compressor. Loosen and remove the two upper bolts. Support the compressor with your hand before completely removing the bolts. The compressor will not fall and you may move it slightly toward the driver’s side.
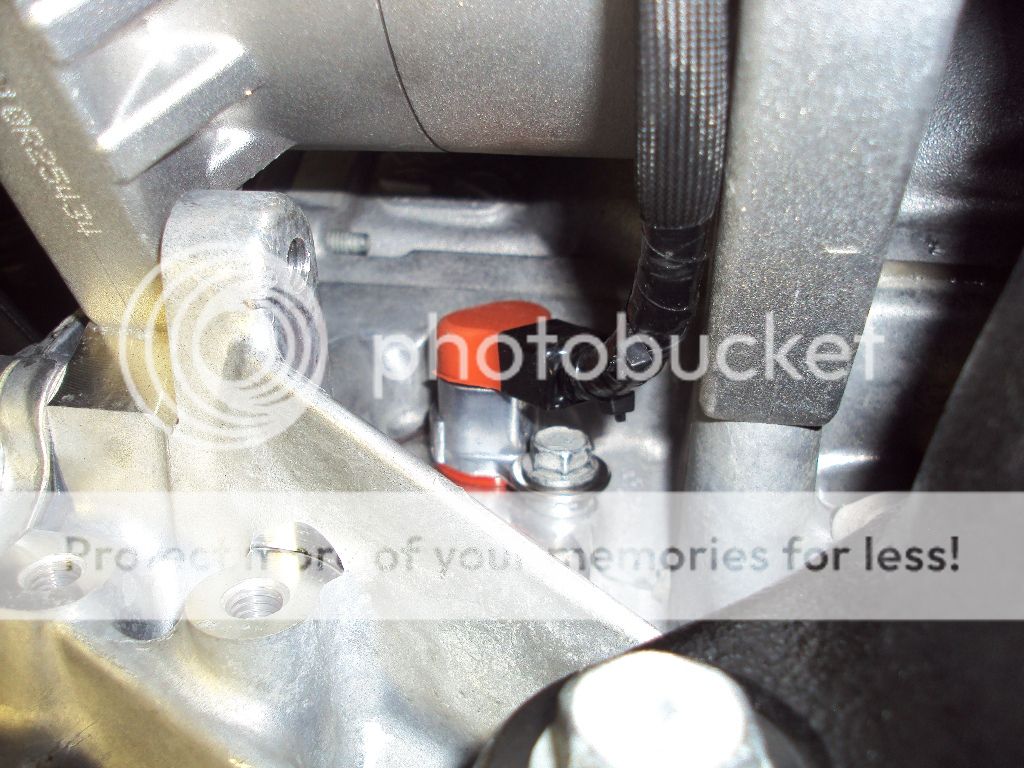
7. Place the heater into the well on the side of the block and install the M6 bolt and washer. Just snug the bolt, do not overtighten!
8. Plug the power cord into the heater and let the rest of the cord hang down for now.
http://i420.photobucket.com/albums/pp282/ssgjurista/DSC01181.jpg
![Image]()
9. While supporting the compressor, start the upper bolts by hand. Make sure they are not cross threaded.
Then tighten the bolts until they are almost touching the compressor.
10. Install the lower bolts by hand ensuring they are not cross threaded, and then tighten to 21 ft lbs.
11. Tighten the upper compressor bolts to 21 ft lbs.
12. Route the power cord underneath the compressor and then up to the engine/ECM harness. Lay the rest of the cord between the ECM and ABS brake module.
NOTE: The power cord comes with pre-installed zip ties so you may fasten it to the ECM harness. I chose not to use them.
http://i420.photobucket.com/albums/pp282/ssgjurista/BottomofCompressor.jpg
![Image]()
http://i420.photobucket.com/albums/pp282/ssgjurista/ACCompressorandHeaterPowerCord.jpg
![Image]()
13. Place the intermediate steering shaft back onto the stub shaft in the firewall and re-install the bolt. Tighten to 35 ft lbs.
14. Use the breaker bar to push/pull the tensioner clockwise or down, then route the belt over the compressor pulley, alternator pulley, and idler pulleys. Slowly release the tensioner and remove the breaker bar.
NOTE: Examine the entire belt to ensure it is lying correctly on all pulleys.
15. Hold the alternator support bracket in place and start the bolts by hand in reverse order of how you removed them. Make sure they are not cross threaded.
16. Tighten the large center bolt to 28 ft lbs. Then tighten the three smaller bolts to 21 ft lbs.
17. Re-install the air intake hose. Don’t forget to connect the temp sensor harness back onto the sensor.
18. Route the rest of the power cord to the front of the Jeep. You may choose to run it out one of the grille slots. Since my grille has the mesh, I routed the cord between the washer fluid reservoir and out to the left front body mount.
![Image]()
http://i420.photobucket.com/albums/pp282/ssgjurista/DSC01179.jpg
2012 Sport S Unlimited
Tools & Supplies
1/2" drive breaker bar
3/8” or 1/2" drive ratchet
3/8” or 1/2" drive extensions
10mm, 13mm, 16mm, and 5/16” sockets
10mm combination wrench
Diagonal pliers
Torque wrench
Mopar Engine Block Heater, Part Number 4609325AB
Mopar Heater Power Cord, Part Number 68142875AA
M6x1.0x25mm bolt
M6 flat washer
Notes
A. The block heater is a dry type and sets in a pocket or well on the driver’s side of the block behind the AC compressor.
B. The power cord is similar to a standard UL listed AC voltage cord with one end designed to plug into the heater and the other end featuring a male plug.
C. Optional: I placed 3/8” plastic loom over the power cord to provide more protection.
Steps
1) Remove the air intake hose from the air cleaner and throttle body. Remove the two bolts that fasten it to the top of the radiator and loosen the clamp on each end. Make sure to unplug the inlet air temperature sensor harness.
http://i420.photobucket.com/albums/pp282/ssgjurista/DSC01168.jpg

2) Remove the four bolts from the alternator support bracket and remove the bracket. Once the bracket is out of the way, you will be able to see the serpentine belt and idler pulleys.
NOTE: The alternator is still mounted and will not fall.
http://i420.photobucket.com/albums/pp282/ssgjurista/5Nov2012009.jpg
http://i420.photobucket.com/albums/pp282/ssgjurista/DSC01170.jpg
3. Insert a ½” drive breaker bar in the square hole on the belt tensioner and push/pull the tensioner clockwise or down. While holding the breaker bar with one hand, remove the serpentine belt from the idler pulleys and alternator pulley. Then slowly release the belt tensioner. Then remove the belt from the AC compressor pulley.
NOTE: It may be helpful to draw a quick sketch of the belt routing to aid in re-installing the belt.
http://i420.photobucket.com/albums/pp282/ssgjurista/5Nov2012010.jpg
http://i420.photobucket.com/albums/pp282/ssgjurista/5Nov2012012.jpg

4. Remove the bolt from the upper end of the intermediate steering shaft where it attaches to the stub shaft on the firewall. Pull the shaft toward the front of the Jeep; it will compress. Then carefully lay the shaft down. This will allow easier access to the upper compressor bolts.
http://i420.photobucket.com/albums/pp282/ssgjurista/DSC01171.jpg

5. From underneath the Jeep, loosen and remove the two lower compressor bolts.
6. Carefully remove the engine/ECM harness from the studs on the compressor. Loosen and remove the two upper bolts. Support the compressor with your hand before completely removing the bolts. The compressor will not fall and you may move it slightly toward the driver’s side.
7. Place the heater into the well on the side of the block and install the M6 bolt and washer. Just snug the bolt, do not overtighten!
8. Plug the power cord into the heater and let the rest of the cord hang down for now.
http://i420.photobucket.com/albums/pp282/ssgjurista/DSC01181.jpg
9. While supporting the compressor, start the upper bolts by hand. Make sure they are not cross threaded.
Then tighten the bolts until they are almost touching the compressor.
10. Install the lower bolts by hand ensuring they are not cross threaded, and then tighten to 21 ft lbs.
11. Tighten the upper compressor bolts to 21 ft lbs.
12. Route the power cord underneath the compressor and then up to the engine/ECM harness. Lay the rest of the cord between the ECM and ABS brake module.
NOTE: The power cord comes with pre-installed zip ties so you may fasten it to the ECM harness. I chose not to use them.
http://i420.photobucket.com/albums/pp282/ssgjurista/BottomofCompressor.jpg

http://i420.photobucket.com/albums/pp282/ssgjurista/ACCompressorandHeaterPowerCord.jpg

13. Place the intermediate steering shaft back onto the stub shaft in the firewall and re-install the bolt. Tighten to 35 ft lbs.
14. Use the breaker bar to push/pull the tensioner clockwise or down, then route the belt over the compressor pulley, alternator pulley, and idler pulleys. Slowly release the tensioner and remove the breaker bar.
NOTE: Examine the entire belt to ensure it is lying correctly on all pulleys.
15. Hold the alternator support bracket in place and start the bolts by hand in reverse order of how you removed them. Make sure they are not cross threaded.
16. Tighten the large center bolt to 28 ft lbs. Then tighten the three smaller bolts to 21 ft lbs.
17. Re-install the air intake hose. Don’t forget to connect the temp sensor harness back onto the sensor.
18. Route the rest of the power cord to the front of the Jeep. You may choose to run it out one of the grille slots. Since my grille has the mesh, I routed the cord between the washer fluid reservoir and out to the left front body mount.

http://i420.photobucket.com/albums/pp282/ssgjurista/DSC01179.jpg


