I thought I would capture my latest project, a 2004 Wrangler Unlimited build. Not to go into a long story here, but I went from a '05 TJ, to a '11 JKU Rubicon, and then back to my TJ. After driving the TJ again for a while I missed the room of the JKU, but loved the simplicity of the TJ platform. The end result was a search and ultimate purchase of the LJ.
Since acquiring the LJ, 3 weeks ago, I first mapped out a plan, ordered parts, and then began the transformation in earnest 2 weeks ago. To start with, because I'm admittedly somewhat anal, I first tackled a number of things that were more in the area of preventative maintenance. Here I:
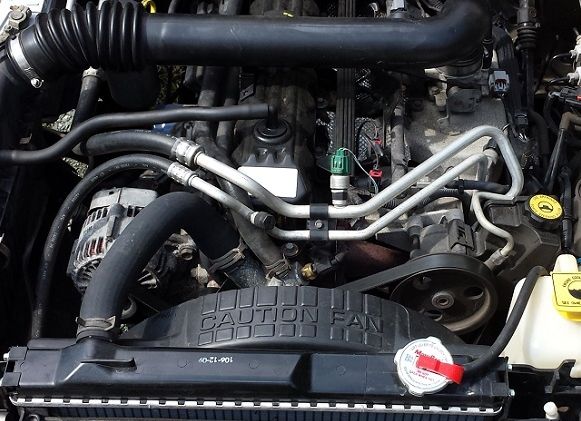
- replaced entire cooling system (radiator, water pump, thermostat, & hoses)
- replaced serpentine belt & pulleys
- replaced timing chain, gears, front seal, & cover gasket
- replaced oil pump & oil pan gasket
- replaced ignition coil pack & spark plugs
- drained & filled transfer case with synthetic fluid
- replaced automatic transmission filter and fluid
- replaced valve cover gasket
- added a automatic transmission cooler
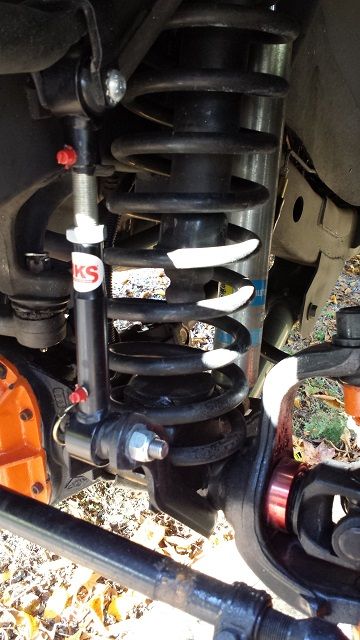
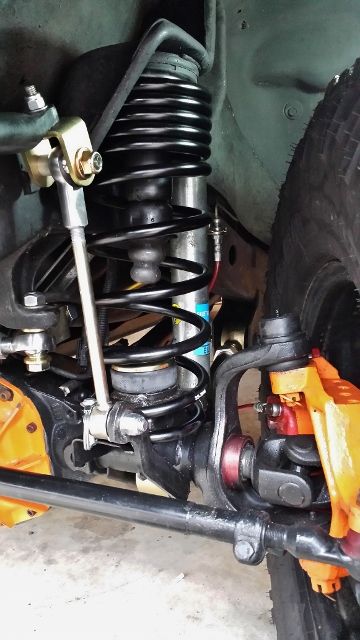
Once that was completed in a marathon weekend, I then started on the suspension. Here I added the following:
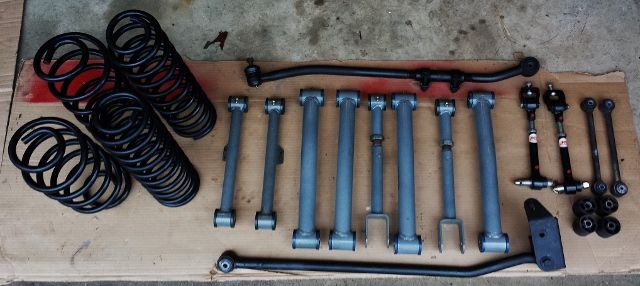
- 4" BDS Lift with upper and lower control arms
- 1" Daystar body lift
- Bilstein 5100 shocks
- JKS MML
- UCF Tummy Tuck
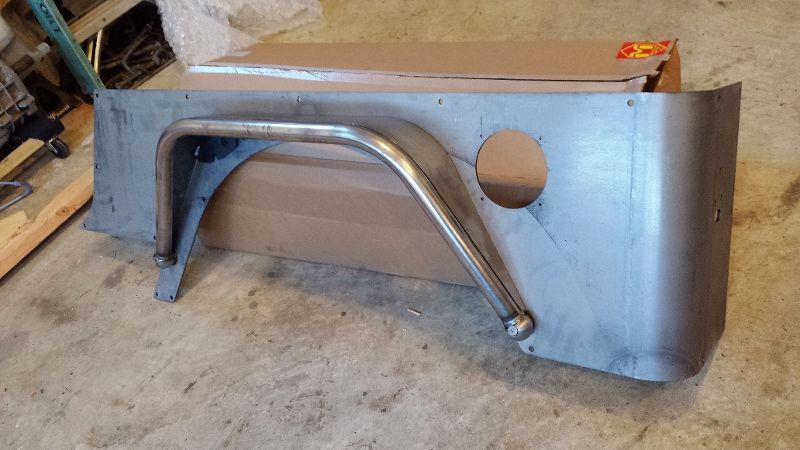
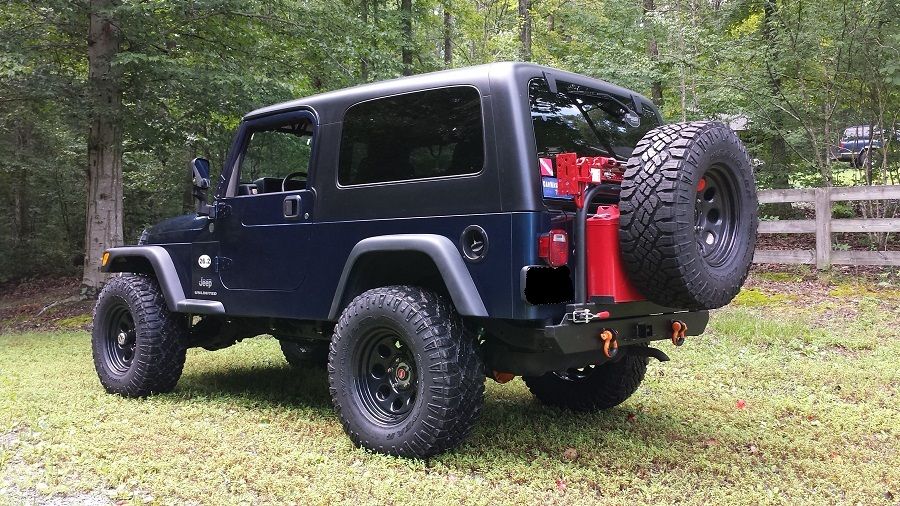
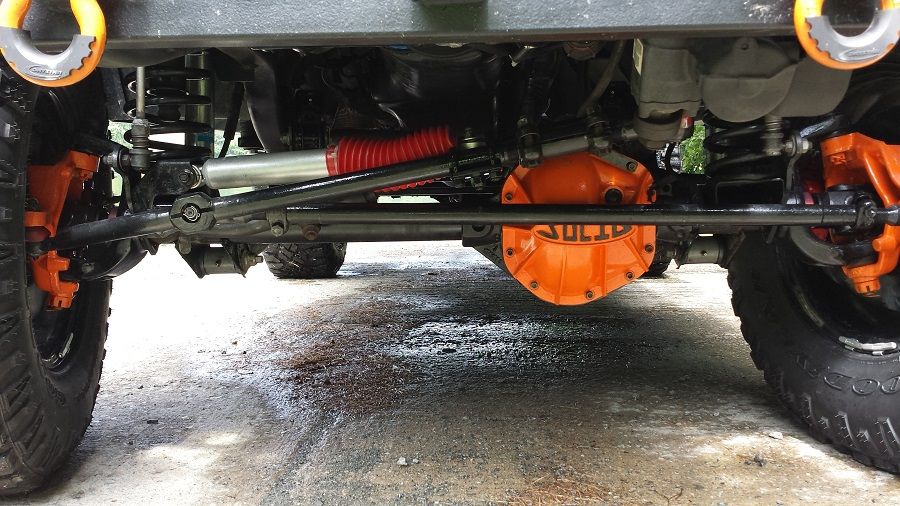
- Rubicon rear with all new bearings, seals, and Superior axles and Solid diff cover
- Rubicon front with Reid knuckles, Warn Lockout hub conversion, Dutchman axles, all new bearings, seals, and Solid diff cover
- New Chevy brake rotors, calipers, hoses, etc. on front rear
- New brake rotors, calipers, hoses, etc. on rear
- Currie HD steering system
- Rancho HD steering stabilizer
With the suspension done, I then topped it off with:
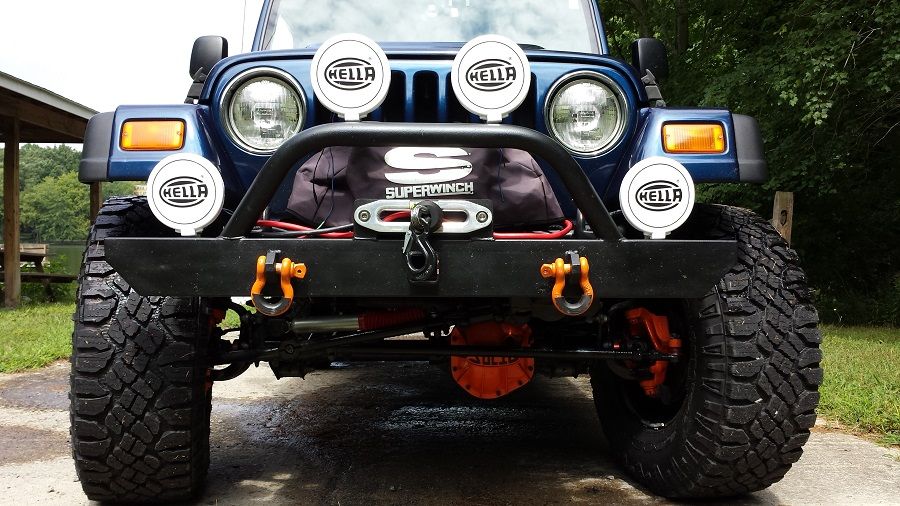
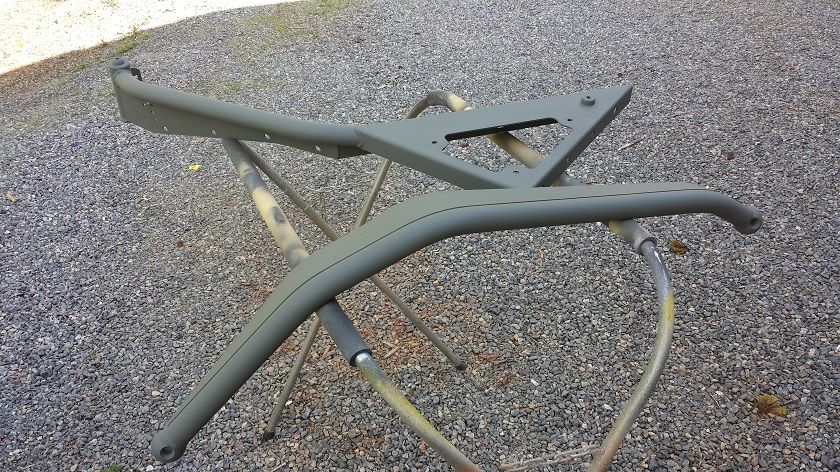
- Nates front bumper with 9K lb Superwinch and synthetic line
- Nates rear bumper with tire carrier, highlift jack, and jerry can holders
- 315/70R17 Goodyear Duratracs on Allied 17" steel wheels
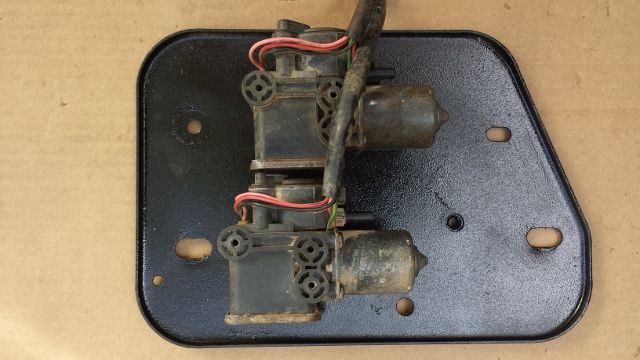
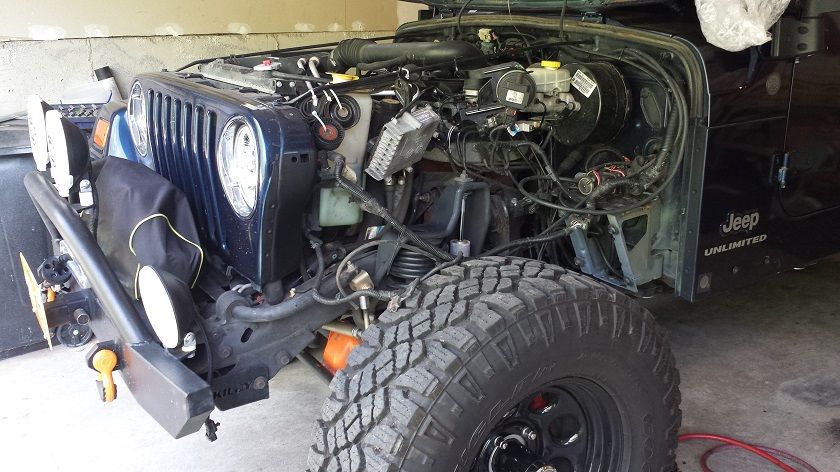
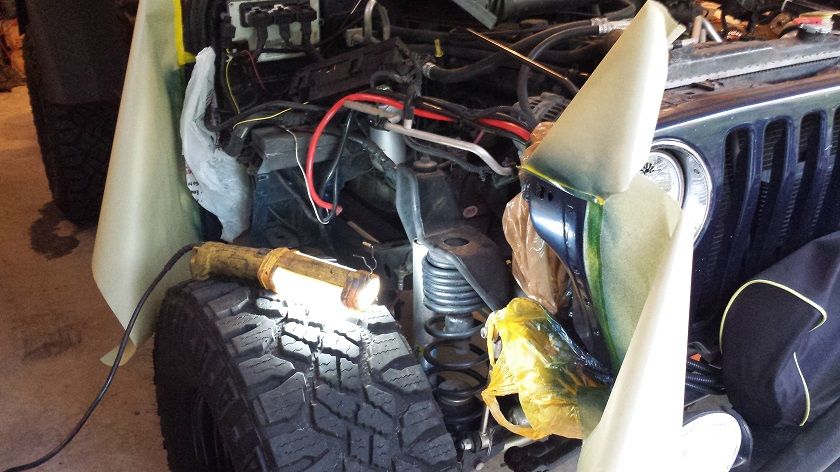
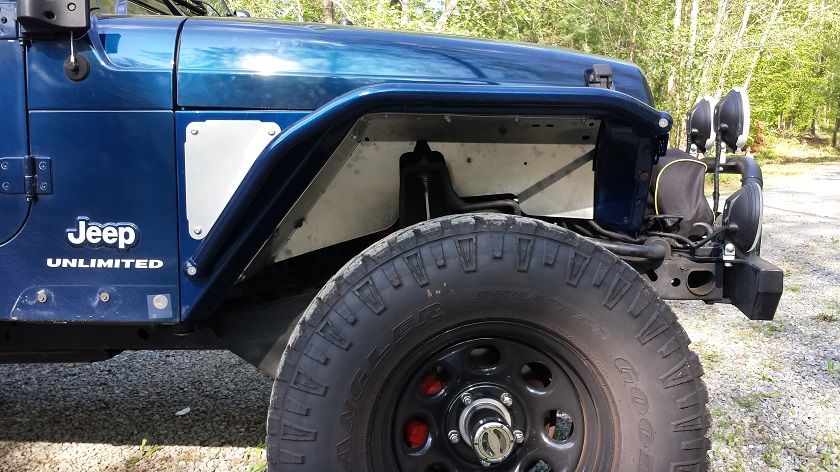
Although I have some odds and end to tidy up, the net result was a transformation from this (i.e. 9" of clearance at the transfer case skid) :
![Image]()
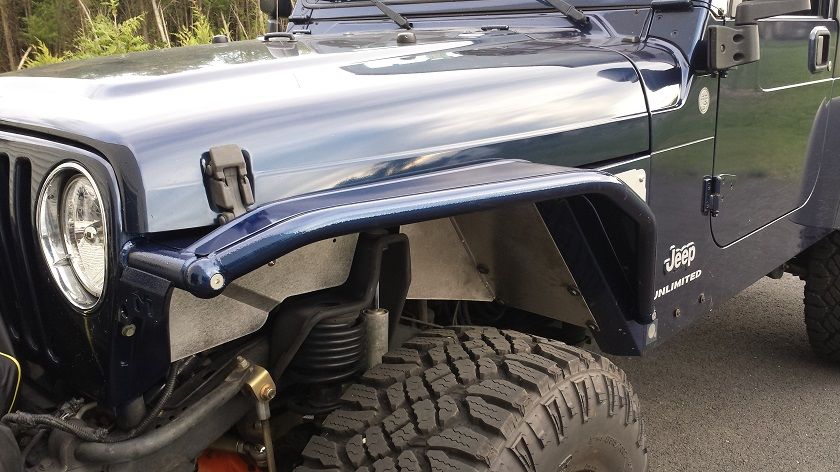
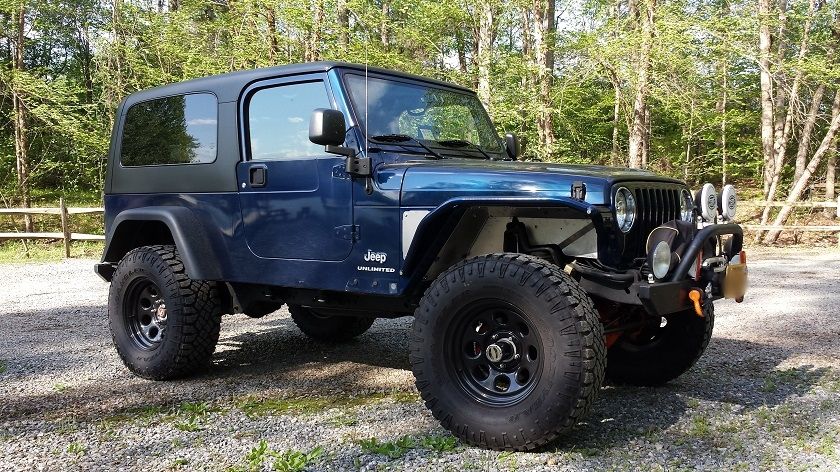
To this (20" of clearance at the transfer case skid):
![Image]()
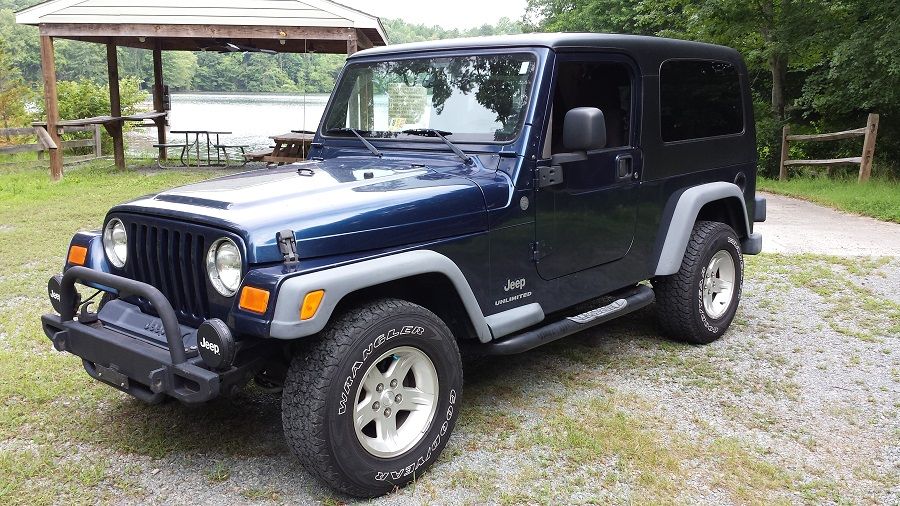
![Image]()
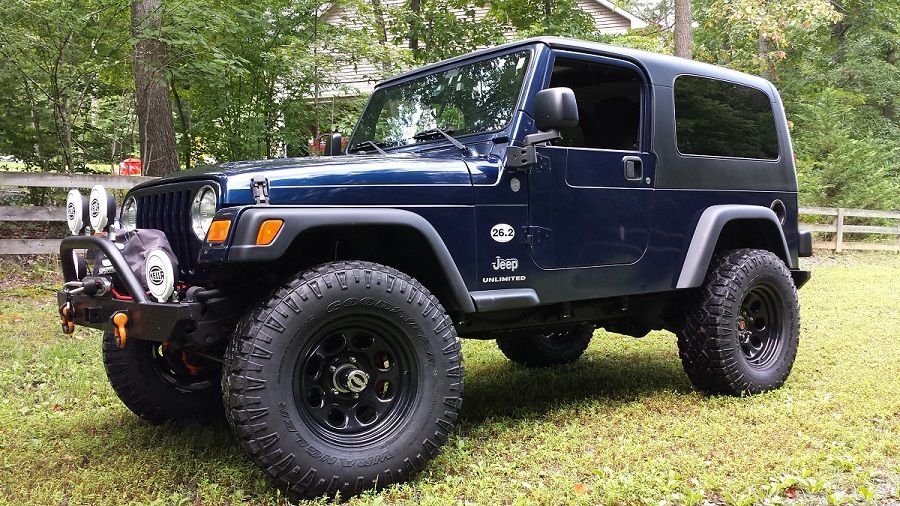
![Image]()
As always, there is more to come!
Since acquiring the LJ, 3 weeks ago, I first mapped out a plan, ordered parts, and then began the transformation in earnest 2 weeks ago. To start with, because I'm admittedly somewhat anal, I first tackled a number of things that were more in the area of preventative maintenance. Here I:
- replaced entire cooling system (radiator, water pump, thermostat, & hoses)
- replaced serpentine belt & pulleys
- replaced timing chain, gears, front seal, & cover gasket
- replaced oil pump & oil pan gasket
- replaced ignition coil pack & spark plugs
- drained & filled transfer case with synthetic fluid
- replaced automatic transmission filter and fluid
- replaced valve cover gasket
- added a automatic transmission cooler
Once that was completed in a marathon weekend, I then started on the suspension. Here I added the following:
- 4" BDS Lift with upper and lower control arms
- 1" Daystar body lift
- Bilstein 5100 shocks
- JKS MML
- UCF Tummy Tuck
- Rubicon rear with all new bearings, seals, and Superior axles and Solid diff cover
- Rubicon front with Reid knuckles, Warn Lockout hub conversion, Dutchman axles, all new bearings, seals, and Solid diff cover
- New Chevy brake rotors, calipers, hoses, etc. on front rear
- New brake rotors, calipers, hoses, etc. on rear
- Currie HD steering system
- Rancho HD steering stabilizer
With the suspension done, I then topped it off with:
- Nates front bumper with 9K lb Superwinch and synthetic line
- Nates rear bumper with tire carrier, highlift jack, and jerry can holders
- 315/70R17 Goodyear Duratracs on Allied 17" steel wheels
Although I have some odds and end to tidy up, the net result was a transformation from this (i.e. 9" of clearance at the transfer case skid) :
To this (20" of clearance at the transfer case skid):
As always, there is more to come!