Jeep Wrangler Forum banner

Smittybilt SRC classic rock crawler rear...who has it?

11K views 40 replies 15 participants last post by  John in VA  
#1 ·
I can get it for $120... 1/4" steel! And hitch receiver and 2 d rings....I don't think I should pass this up, free shipping too

I have Warn rock crawler front but this is much cheaper than the warn rear
 
#2 ·
With some frame tie-ins, $120 would be worth the money to have solid recovery points. However, expect to have to drill out some new holes and either strip the powder coating and reapply, or just paint it.

I personally avoid Smitty though.....but I won't make my post about that.
 
#4 ·
i have the smittybilt classic front bumper with D-rings and the bolts were about 1/16th of an inch off, i just drilled them out a little bit bigger and used washers and new bolts, didnt HAVE to do anything to the powdercoat but the rear bumper i bought (procomp) had bed liner on it so i just sanded down the powdercoating and bedlined it, havent had any problems
 
#5 ·
heres the procomp one, looks pretty much the same as my smittybilt front bumper but didnt have to redrill and it comes bed lined-
Pro Comp Jeep Crawler Bumpers - Truck Customizers


btw i got mine from that site with free shipping as well, might want to ask about it
 
#6 ·
I have one. I paid one penny less.:D 
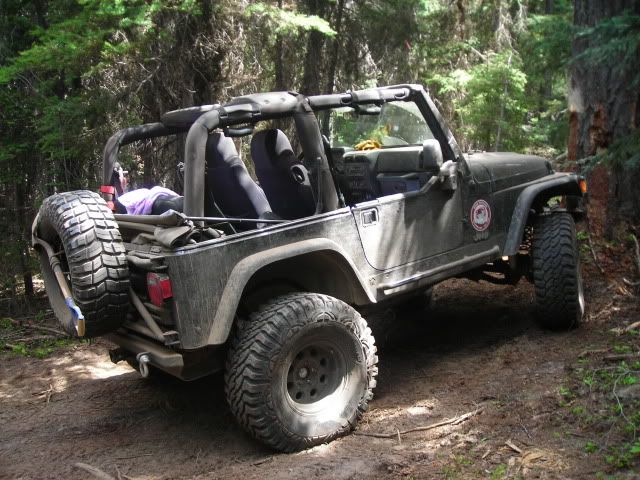
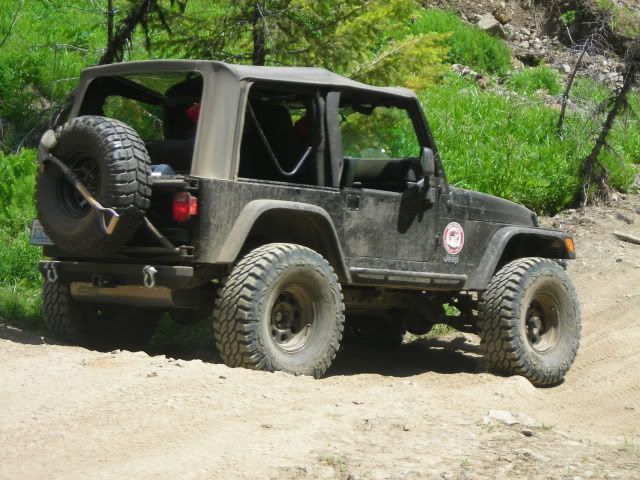
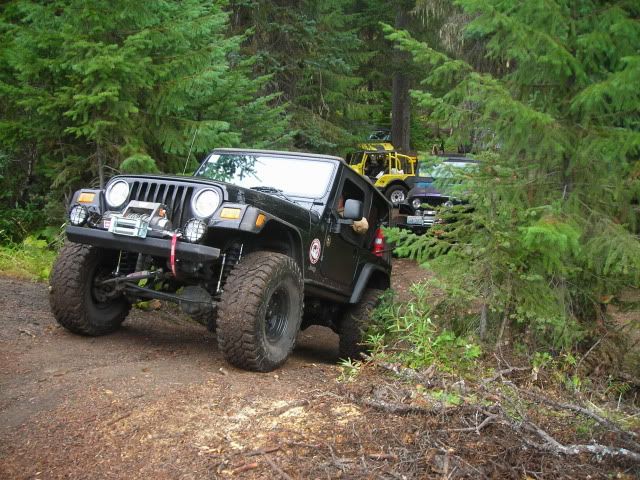
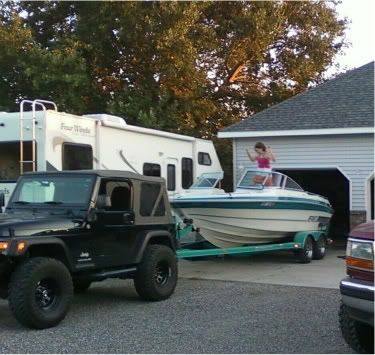
I like it. My buddy has a Smitty bumper/tire carrier combo on his YJ and it really flexes bad with the weight of a 33" tire on it. Maybe it's the way it mounts to a YJ, idk. I have the bumper only, and it feels pretty stout. I coupled the bumper with a Bestop tub mounted tire carrier, so I don't have that problem. I use the Jeep to haul my heavy 20' V8 bowrider boat and the car trailer around the house to the backyard. There is no movement of the bumper on the mounting points. I have also had no problems with powder coating, even the front bumper that has been on the Jeep over 3 years. It does have some bark marks on the ends though.:)

Image

Image

Image

Image
 
#9 ·
On mine it was easy. All the holes lined up. No drilling required. Chase the threads in the bumper before you install it to clean out the powder coating. It will make the install go smoother. An extra hand to hold it while you are putting the first couple bolts on helps too. Don't tighten anything until you get all the bolts in. That's about all I can remember....there was a beer can on the fender! lol

Edit: I forgot that I had my gas tank removed to install my Savvy gas tank skid. That probably made the bumper install so easy.
 
#10 ·
TJDave said:
On mine it was easy. All the holes lined up. No drilling required. Chase the threads in the bumper before you install it to clean out the powder coating. It will make the install go smoother. An extra hand to hold it while you are putting the first couple bolts on helps too. Don't tighten anything until you get all the bolts in. That's about all I can remember....there was a beer can on the fender! lol

Edit: I forgot that I had my gas tank removed to install my Savvy gas tank skid. That probably made the bumper install so easy.
Ah crap, so the gas tank was off when you do it? I feel like I'd have no idea how to drop my gas tank, sounds complex
 
#11 ·
I also have the SRC Classic rear bumper:

Image


Yes, you will need to drop the gas tank to install the bumper. This is because the SRC has 4 braces that go on the back of the cross member, and you just aren't going to be able to install the inner ones (and the accompanying bolts) with the gas tank in place. On the plus side, this would be a great time to install an upgraded gas tank skid plate... or replace your faulty fuel level sending unit. I did both of those operations at the same time I installed the bumper. :)

This is a strong bumper. Don't let the brand name fool you.
 
#16 ·
I am almost sure they are the same bumper with a different coating on each, but the same mounting points. Dropping the tank is not absolutely necessary, but it sure makes install a lot easier. You do not want to skimp on any of the mounting points. I have also heard of some people loosening the body mount bolts and jacking up the rear of the tub to gain access. Good luck with your bumper. Whatever one you decide on, the gas tank will probably always be an issue.
 
#17 ·
mine just mounted in the stock location, took me 20 minutes to put it on myself and that was trying to hold one end with my foot and start bolts on the other end at the same time lol, ive pulled my friends out with the D-rings a few times, as welll as a TOOOOOON of big a$$ trees after a tornado rolled through where i live
 
#18 ·
finished cleaning and went and took some pics, forgot my keys tho and the jeep is backed up against a wall lol, so ill try and find a rear pic somewhere on my comp tried to get a few pics of how it mounts-

Image


heres one of the mounting points on the passenger side, it comes with the reinforcing plated ans the bolts/ nuts / washers, easy to get on (even easier if you have 2 ppl! lol)
Image


passenger side again, lower mount
Image


driver side-
Image

Image

Image

Image

heres the weld on the D-ring mounts, its welded on the inside too, not the BEST looking weld, but im not worried about it ever breaking lol
Image


Image


Image

Image

Image
 
#20 ·
Pock ***** said:
What year is your jeep SC? The website says drilling required for 97-00
Mines an 06, i have the tire carrier version.
+ its tough
+low cost
- drilling the frame was a pita. Holes didn't want to line up with the included template
-its not wide enough to cover the full corners.

You don't have to drop the tank though. Just need a 3" extension for your ratchet, fits in the spot back there perfectly.
 
#25 ·
Hi scgeek12. I just saw your reply and wanted to point something out and ask a question. In your second and fourth photo you show backing plates, each with two bolts. It may not make any difference, but being the perfectioist I am I wanted to mention the plates are installed upside down. The angular cutout on the plate is designed to mate up with the angular dimension of the crossmember. I see someone already pointed that out and you mentioned it wouldn't fit--just curious--seems like fitment would be better if the angles matched. Also, the kit should have come with four backing plates. The two you show are the easiest to install, but the two not shown (those on the other side of the frame rail on both passenger and driver side) are extraordinarily difficult to install due to limited access. did you put those on as well? If not, the strength of your bumper will be greatly compromised, especially when using the recovery points. I can tell you I spent several hours with the help of my son just getting those two inside plates installed. All the rest was easy.
 
#26 ·
i have them on the correct way now, but if you look in the last photo you can see (kind of hard) the lip where the backing plate goes is bent up, i could not fit the backing plates in the right way like this, i ended up just taking a torch and hammer and bending them back a little more, as for the 4 backing plates mine only came with 2, not sure if it was supposed to have 4 but i have used the recovery points several times being winched out and pulling people out and havent had any issues yet but ill look into it, thanks
 
#27 ·
Awesome - good to know just one backing plate supplies that kind of strength. It's probably more important to have all four plates installed with a tire carrier in place because of the additional weight. Here's a link to my posting with photos so you can see where the inside plates go. They attach to the same holes that attached the bumperettes (if you had bumperettes - otherwise might have to drill them). It really is a pain to install them, but you'll be glad they're there - a little piece of mind.

http://www.wranglerforum.com/f8/smi...src-classic-rear-bumper-with-spare-tire-carrier-installation-advice-126411.html

Happy wheeling.
 
#28 ·
Ok I was told that the brackets don't need to be used. But my I'm also going to be on my third bumper from smitty my spares keep breaking welds. I told them they sent me out a booger welded bumper again and they ignored me. I mounted my new bumper after waiting awhile almost two months because I knew a repeat would happen. My 33" spare broke my first bumper and after three days my 35 broke the cArrier pin weld on the new bumper. Called smitty and they said they are pulling bumpers randomly Monday to check welds and said I was a one in a million chance to get two bad bumpers. I told them if they stop letting hellenkeller weld their products they'd have a better rep. Kudos going for breaking number three now!
 

Attachments

#29 ·
Dude! That's terrible! I'll be keeping an eye on mine now. I have a 33" spare that weighs 82 lbs--that's why I got the carrier in the first place. It will definitely get some hammering on the trails about once a week. By the way, when looking at your spare from the side, does it appear vertical, or does it look like it leans outward? I only ask because I saw some postings that showed an outward lean which would clearly place undue stress on the hinge post. I don't have any outward lean right now, but that was one of my concerns regarding the bumper attachment and how secure it was. I was (and am) concerned it will yet happen, even with all four plates behind the cross member. I am contemplating getting frame tie-ins - saw some postings referencing a guy (BESRK) who fabricates them. I really appreciate your posting and I think Smittybilt has a known problem on their hands that more Smittybilt owners should be paying attention to. I looked inside the bumper to see how the post is constructed and noticed the steel post runs all the way through the bumper - top-to-bottom with welds at top and bottom. Is that how yours is constructed?

Thanks again!
 
#30 ·
My carrier with both tires has a outward lean more noticeable with the 35. I have no idea why these welds suck so bad. Just be watchful and listening is the best advice I can give with smitty bumpers. That thing shouldn't make any sound. After first mounting my 35 it was soundness. Then the tire started ripping at the weld. Weird it was leaning with no cause. I can't even wrap my brain around the lean after mounting other then the carrier isn't built to handle that size tire. Smitty is sending me another new one free which is stupidly annoying because I emailed back asking for a refund or upgrade and he ignored me. So im going to sell it.
 
#32 ·
Hi Krista - thanks for the advice. Are your welds breaking? If so, can you post a pic? Here's a couple of pics showing the current mount. I also have a Smitty on the front. I'll definitely be keeping an eye on it over time. So far I've had it on one hard trail ride and no rattles and everything is still tight. We'll see.

 
#34 ·
Testing Smittybilt SCR Classic Rear Bumper with Spare Tire Carrier

Krista:

Cool - much better with the shackle/D-rings. After round three I'm sure you and Smittybilt are becoming real pals! It's good to know they stick by their product, but on the other hand, the weld failure shouldn't have happened in the first place.

So far after several hard rides mine is still solid with no rattles. I highly recommend installing all four backing plates (not fun getting those two inside plates in, but worth it) and I hope you have a better experience with the replacement.

I attached a link to a YouTube video of a test drive in the backyard (the yard filled up with standing water--how could I resist!). You can see the spare tire carrier is pretty solid with no movement beyond what is expected. If I have any issues, I'll be sure to post them as I believe these forums are a great learning tool for all of us.

Jeep YJ Mud Bath - YouTube

Thanks again for all your help!

By the way, Pock *****, sorry for hijacking your thread but it was a helpful discussion. I hope you got squared away with a bumper/spare tire carrier that meets your needs.

Happy New Year!